Next step is to run up a CA this is optional, some reasons why you might want a CA for SCCM:
- HTTPS – You need all SCCM communication to be encrypted
- TDE – You need to encrypt your databases, MBAM for example
- MDM – You want mobile devices to use certificates to authenticate instead of requiring credentials for company resources like mail and Wi-Fi.
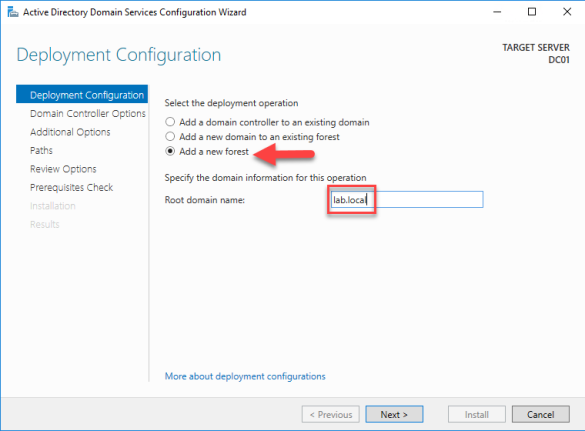
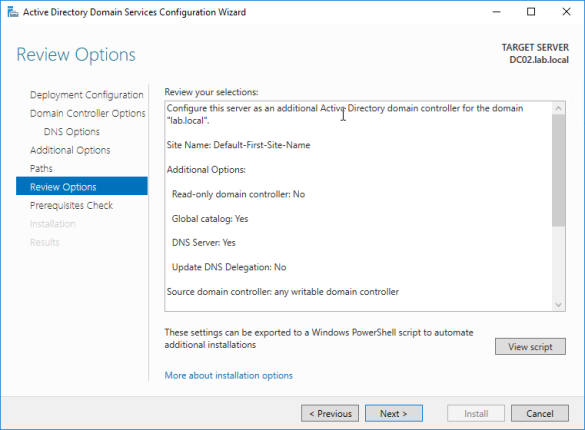
In my lab I’m going to implement a two tier Certificate Authority, an Offline RootCA and a subordinate CA which will be co-hosted on my primary Domain Controller (DC01). For some more details on planning production CA architecture see Securing PKI: Planning a CA Hierarchy.
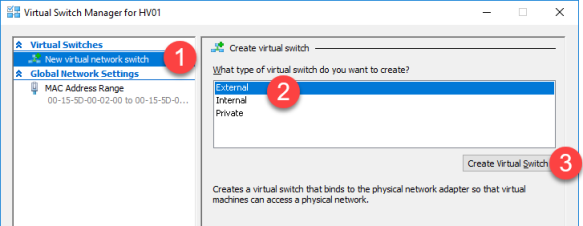
- Create a new Virtual Machine with the below config:
Name: RootCA
Generation: 2
Startup Memory: 1024
Use Dynamic memory for this VM: Yes
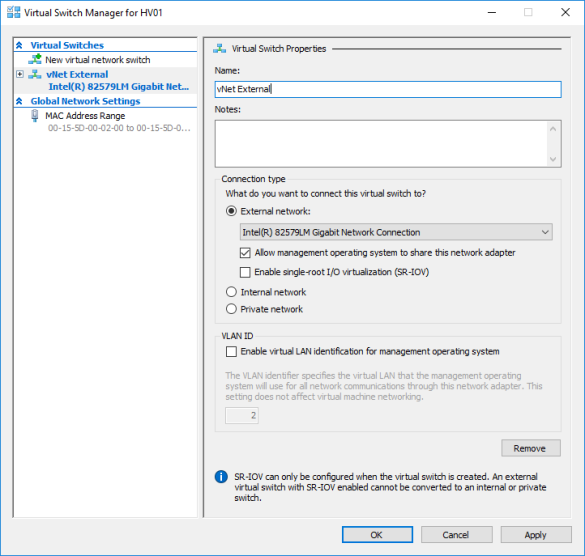
Connection: vNet External - Install Windows Server 2016 Standard
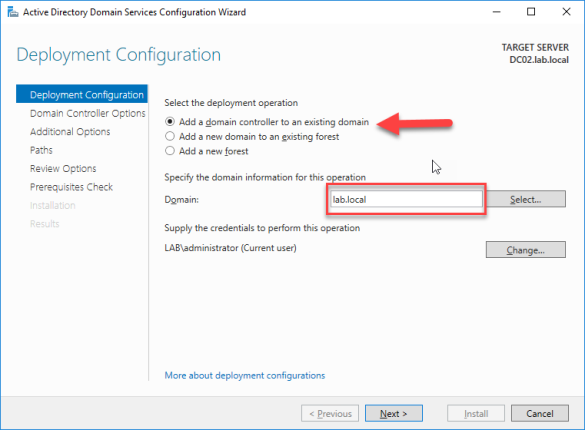
Note: This server MUST NOT be joined to your domain. - Set a static IP address, mines 192.168.0.250
- Give your server a name, mines RootCA.
- In Server Manger click Manage> Add roles and Features
- Under Server Roles tick Active Directory Certificate Services and click Next.

- Click Next until you get to Role Services.
- Select Certificate authority and click Next.

- Click Install
- Under Server Manager click the flag> Configure Active Directory Certificate Services.

- Make sure you’re using the administrator account.

- Select Certificate Authority and click Next.

- Select Standalone CA and click Next.

- Select RootCA and click Next.

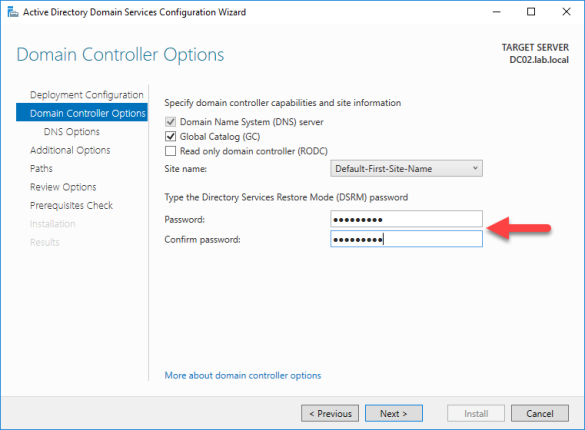
- Select create a new private key and click next.

- Leave the default cryptography and click next. You’ll be fine as long as it’s not SHA-1

- Change the common name, i’m using RootCA and click next.

- Increase validity period to 20 years and click next.

- Leave the certificate database in the default location and click next.
- Click Configure
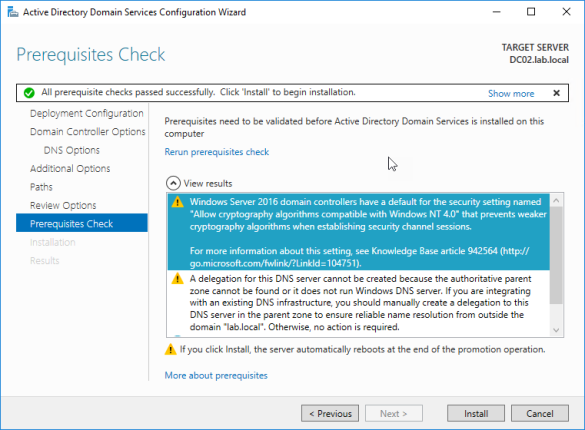
- Confirm configuration successful.

- Open Regedit and increase the REG_DWORD ‘ValidityPeriodUnits’ to ’20’, located here:
HKEY_LOCAL_MACHINE\SYSTEM\CurrentControlSet\services\CertSvc\Configuration\RootCA\ValidityPeriodUnits - Open PowerShell and run the following commands:
certutil –setreg caDSConfigDN CN=Configuration,DC=lab,DC=local
certutil -setreg caDSDomainDN “DC=lab,DC=local”
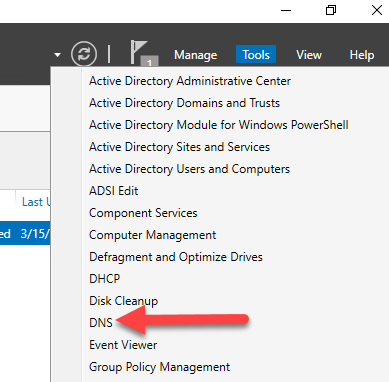
- Launch Certificate Authority from Server Manager
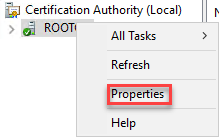
- Right Click RootCA>Properties
- Browse to the Extensions tab.

- Add a new CRL Distribution Point extension – http://DC01/CertEnroll/<CaName><CRLNameSuffix><DeltaCRLAllowed>.crl and select the following:

- Select ‘C:\Windows…’ CRL Distribution Point and select Publish CRLs to this location only.

- Under Select extension change to AIA.

- Add a new AIA – http://DC01/CertEnroll/<ServerDNSName>_<CaName><CertificateName>.crt and select the following:

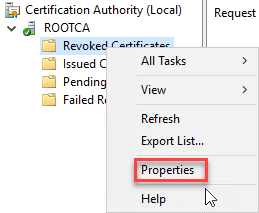
- In Certificate Authority right click Revoked Certificates>Properties
- Change CRL interval to 20 years

- In Certificate Authority right click Revoked Certificates>All Tasks>Publish

- Click Next.

- Copy files in C:\Windows\System32\CertSrv\CertEnroll -> \\DC01\C$\Windows\System32\CertSrv\CertEnroll
- Now Jump on DC01 and install Certificate Authority
- Under Role Services, select Certificate Authority and Web Enrollment point.

- Install the roles and features.
- Under Server Manager click the flag> Configure Active Directory Certificate Services.

- Make sure your using an account with Enterprise Administrator rights and click Next.
- Select Certification Authority and Certification Authority Web Enrollment point and click next.

- Select Enterprise CA and click next.

- Select Subordinate CA and click next.

- Select create a new Private Key and click Next.

- Leave the default cryptography and click next.

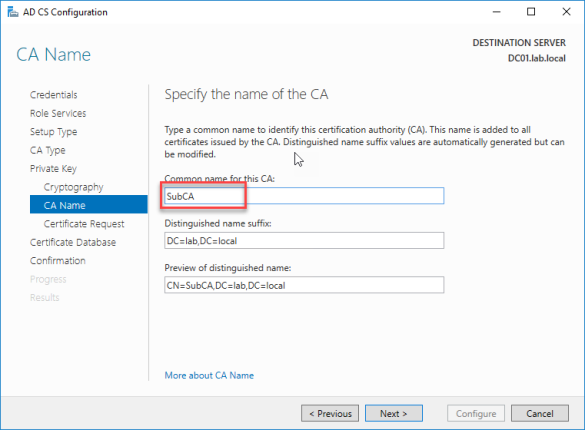
- Give the subordinate CA a common name, mines SubCA.
- Save a certificate request to the local machine.

- Finish the Installation with the remaining defaults.

- Copy the certificate back to RootCA
- On RootCA open Certificate Authority and right click on RootCA>All Tasks>Submit new request.

- Browse to the req file.
- Select Pending requests and right click on the pending request>All tasks>Issue

- Select Issued Certificates and open the certificate just issues
- Click Copy file
- Select Cryptographic Message Syntax Standard and tick Include all certificates in the certification path if possible.
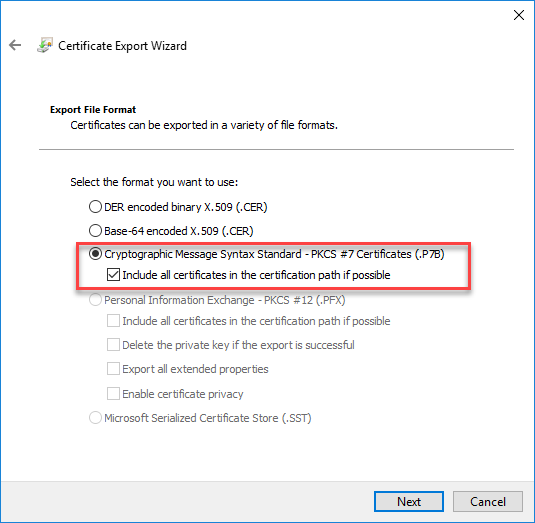
- Export file to C:\SubCA.p7b
- Copy the file back to Dc01
- On DC01 Open Certificate Authority>All Tasks Install CA Certificate and browse to the SubCA.p7b

- Click Ok to the warning.

- Start the CA service, you should get a green tick as per below.

- Export Certificates and deploy via Group Policy.