This post will really only be applicable where you are running this up at home or a lab. Please don’t use this as guidance on building a production domain…
Some details on my hypervisor spec –
CPU – Intel Xeon E5-1650 @ 3.5GHz
RAM – 64GB
C:\ – 256GB SSD
V:\ – 1TB SSD
Hypervisor
- Install Windows Server 2016 Datacenter, media can be downloaded here.
- Set a static IP address, mines 192.168.0.100 as it’s sitting on my home network.
- Give your server a name, mines HV01 as in hypervisor 1.
- Install Hyper-v, open PowerShell and run the below:
Install-WindowsFeature –Name Hyper-V -IncludeManagementTools -Restart

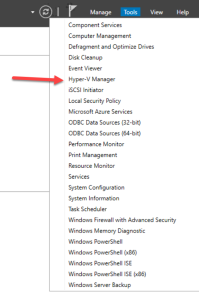
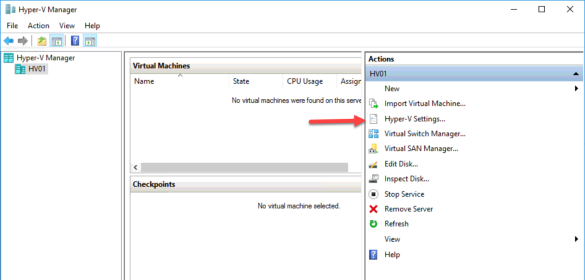
- Open Hyper-V Manager
- Open Hyper-V Settings
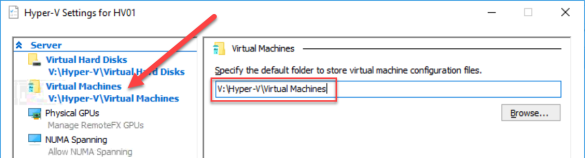
- Change Virtual Hard Disks to ‘V:\Hyper-V\Virtual Hard Disks’

- Change Virtual Machines to ‘V:\Hyper-V\Virtual Machines’
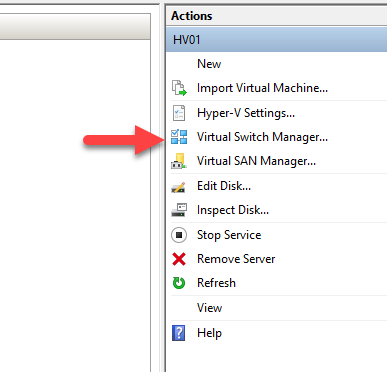
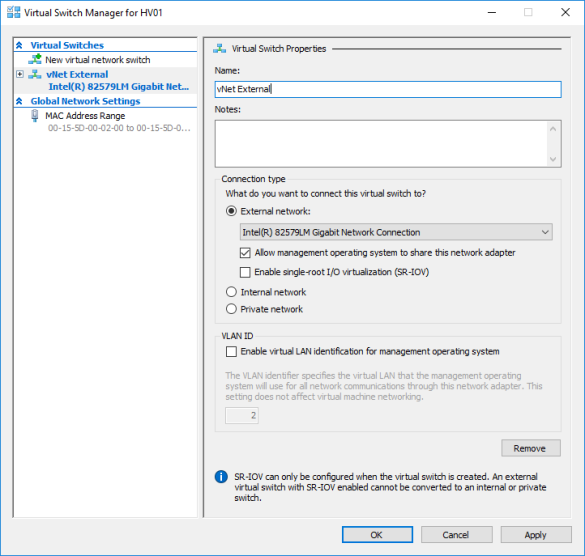
- Open Virtual Switch Manager
- Select New virtual network switch, external and click Create Virtual Switch
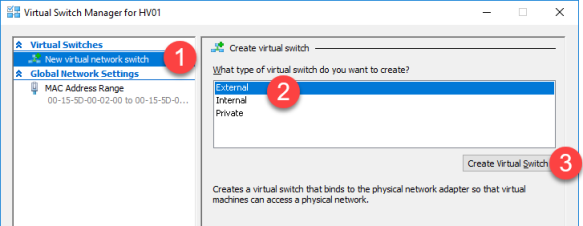
- Give it a name and select external network.
- Install data deduplication, open PowerShell and run the below:
Import-Module ServerManager
Add-WindowsFeature -name FS-Data-Deduplication

- In Server Manager browse to File and Storage Services>Volumes
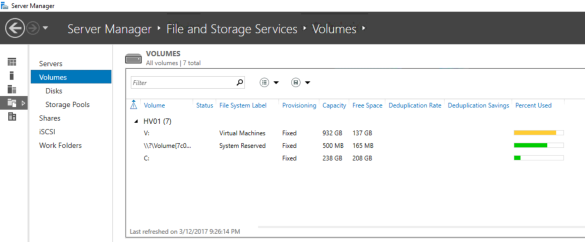
- Right click on the volume you’re storing your VM’s on, ‘V:’ in my case and select ‘Configure data deduplication’.
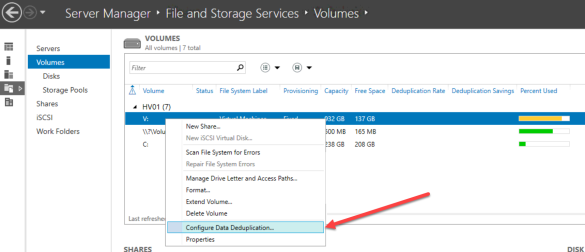
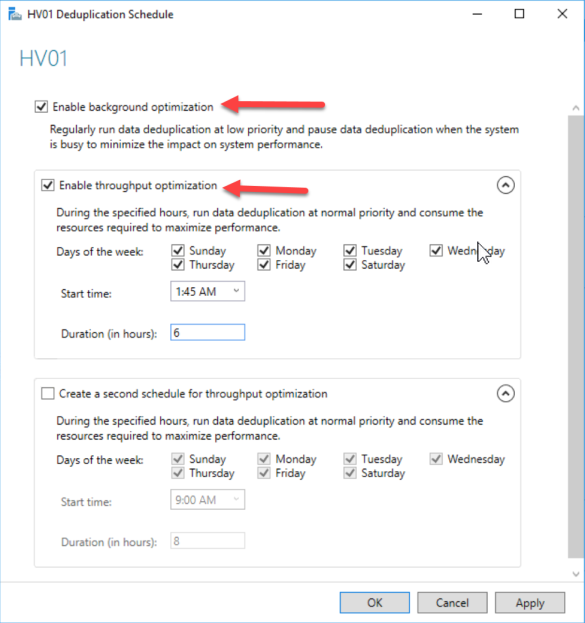
- Change Data Deduplication to Virtual Desktop Infrastructure and then click Set Deduplication Schedule.
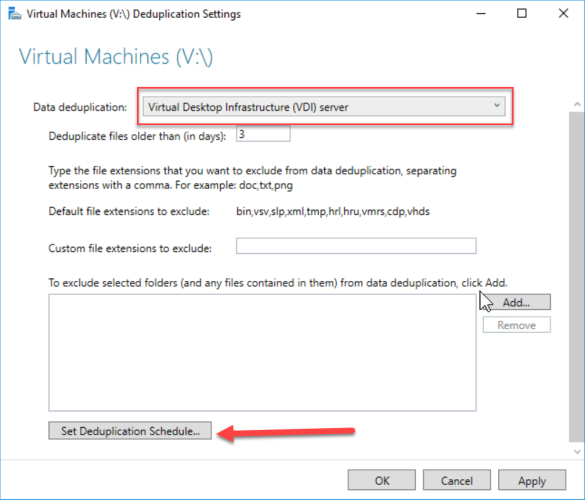
- Configure an appropriate schedule, mines pretty aggressive because it’s a lab and I’m not fussed when it runs.
- Install all Windows Updates
Domain Controller 1
- Create a new Virtual Machine with the below
Name: DC01
Generation: 2
Startup Memory: 1024
Use Dynamic memory for this VM: Yes
Connection: vNet External - Install Windows Server 2016 Standard
- Set a static IP address, mines 192.168.0.101
- Give your server a name, mines DC01 as in Domain Controller 1
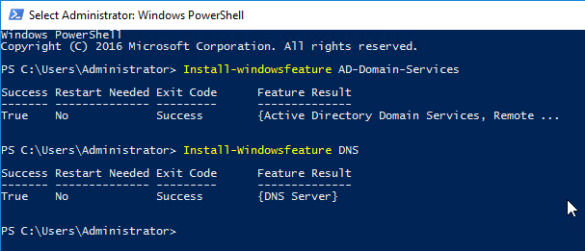
- Install Active Directory Domain Services, DNS, open PowerShell and run the below:
Install-windowsfeature AD-Domain-Services
Install-Windowsfeature DNS
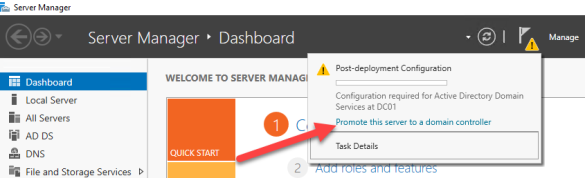
- In Server Manager click on the flag and run Promote this server to a domain controller.
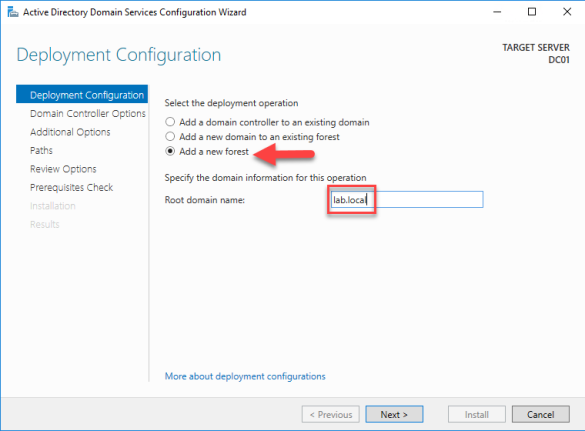
- Select Add a new forest and enter a domain name and click Next.
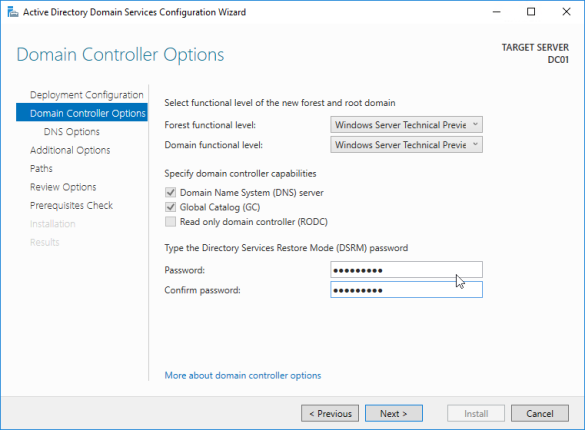
- Enter a password and click Next.
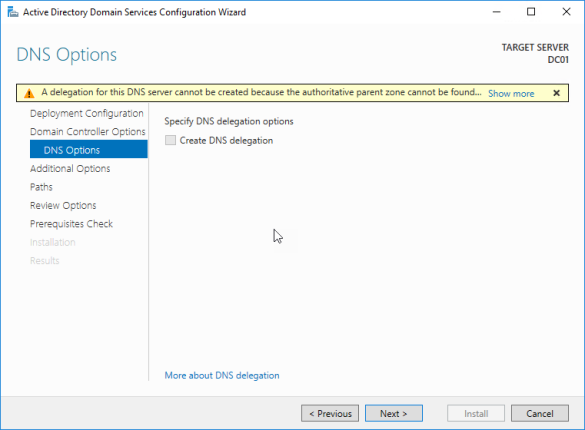
- Click Next.
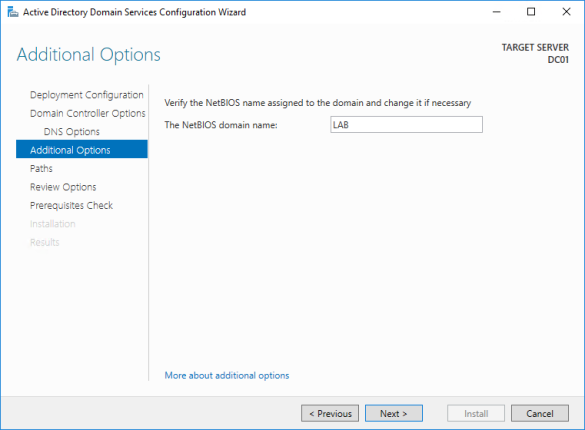
- Set an NetBIOS name and click next.
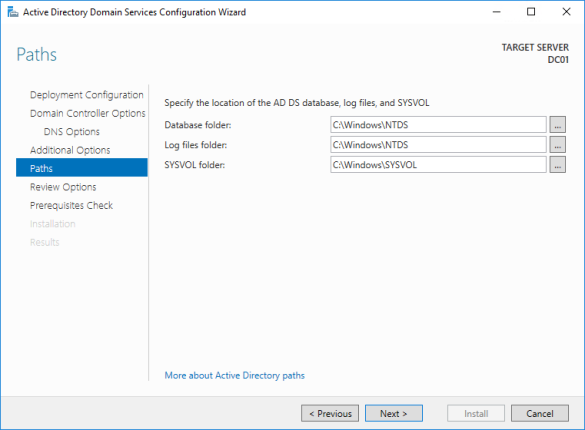
- Configure locations, I’m using the defaults.
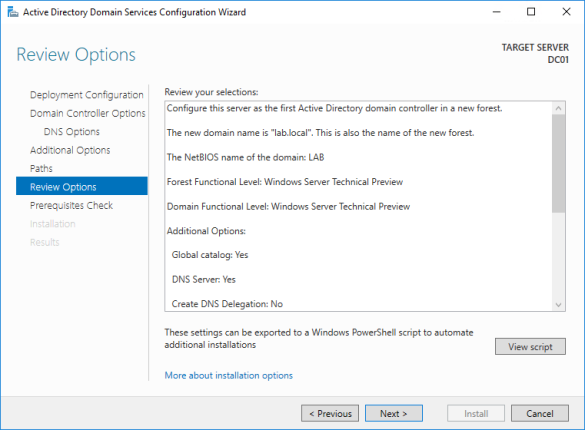
- Review options and click Next.
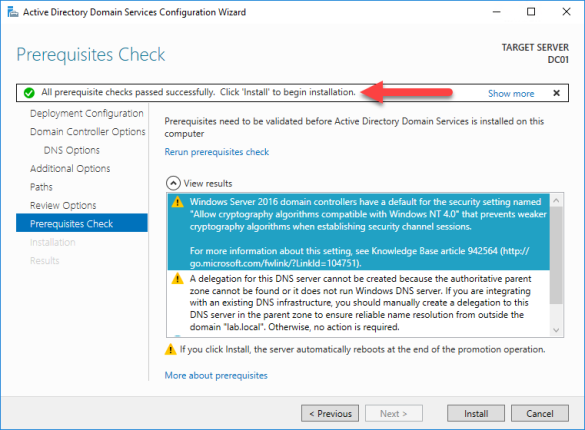
- Review pre-requisite check and click install.
- Server will be restarted
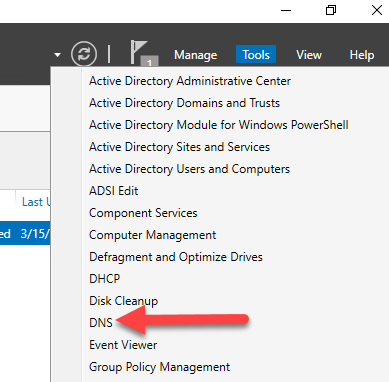
- Launch DNS from Server Manager
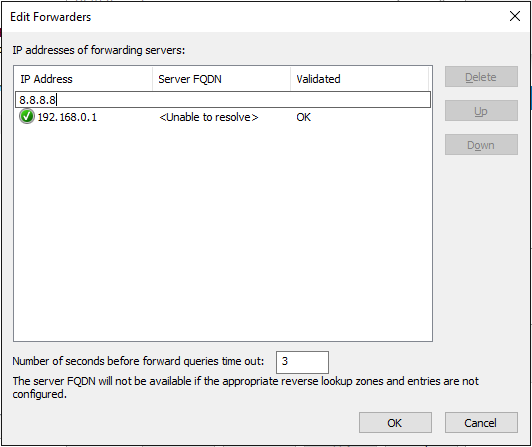
- Select DC01>Forwarders>Edit
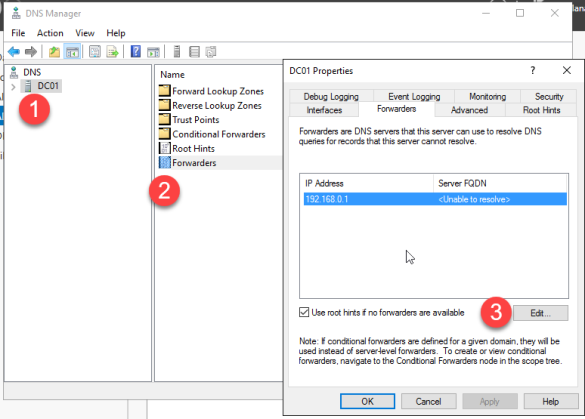
- Enter Google or another external DNS server, I’m using 8.8.8.8 then hit enter.
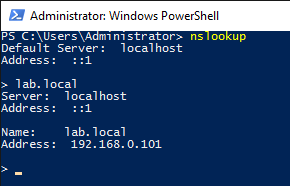
- Confirm you can resolve your new domain with nslookup.
Domain Controller 2
- Create a new Virtual Machine with the below
Name: DC02
Generation: 2
Startup Memory: 1024
Use Dynamic memory for this VM: Yes
Connection: vNet External - Install Windows Server 2016 Standard
- Set a static IP address, mines 192.168.0.102
- Give your server a name, mines DC02 as in Domain Controller 2
- Join the server to your newly created domain
- Install Active Directory Domain Services, DNS, open PowerShell and run the below:
Install-windowsfeature AD-Domain-Services
Install-Windowsfeature DNS
- In Server Manager click on the flag and run Promote this server to a domain controller.
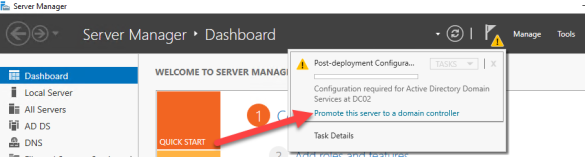
- Select Add a domain controller to an existing domain, enter your domain name and click Next.
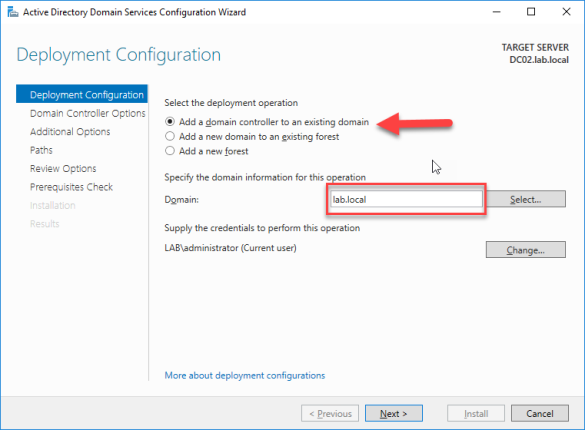
- Enter a password and click next.
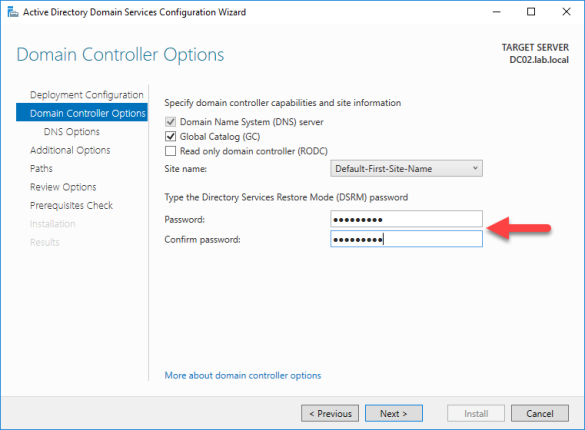
- Click Next

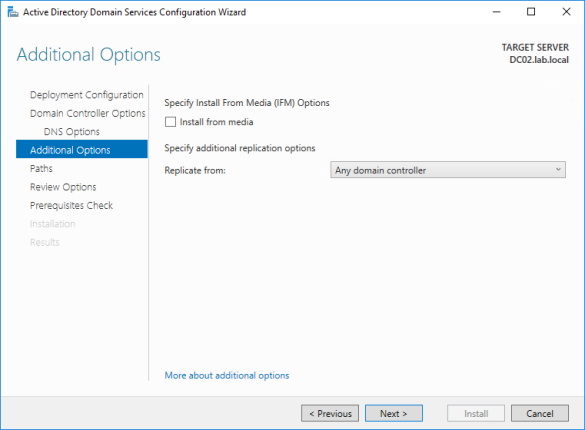
- Click Next
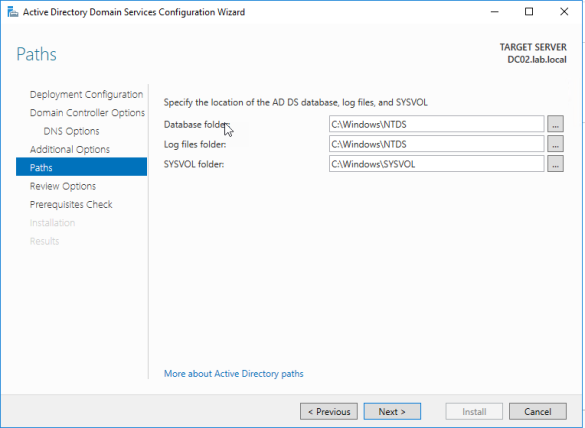
- Set paths and click Next
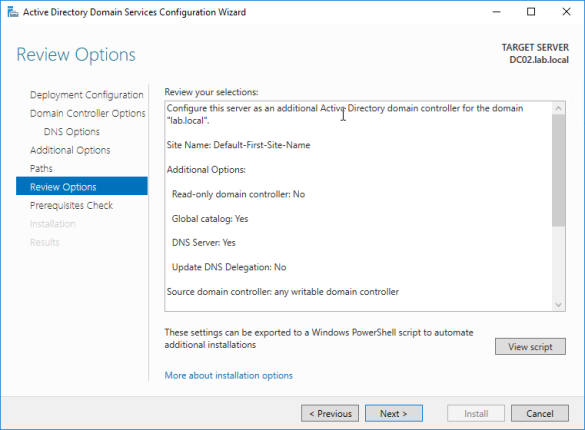
- Review config and click next.
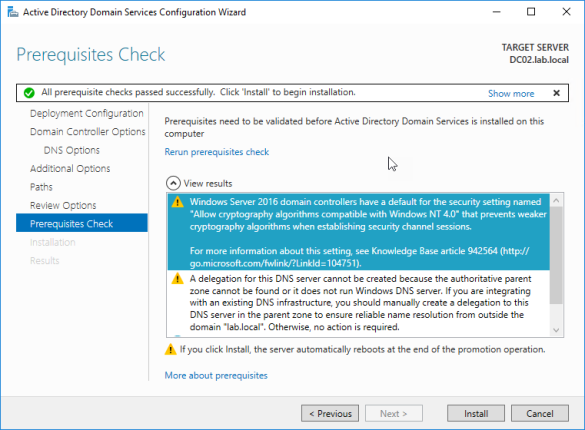
- Confirm pre-reqs are met and click install.
- Confirm you can resolve your new domain with nslookup.
References:
Windows Server 2012 Hyper-V Best Practices (In Easy Checklist Form)
